サーバーが壊れて修理した話
投稿日: 2025/12/09
自宅サーバーが壊れました

Proxmox上でLinuxのSelf-Hosted Runnerを立てたので、備忘録として書いておきます。
まずはProxmox上でUbuntuのコンテナを立てます。Proxmoxでない場合は飛ばしてください。
コンテナを立てます。イメージはテンプレートにあるものを使います。
今回は以下のように設定しました。メモリやストレージは用途に応じて設定します。
まずは root でログインして以下のコマンドで新しくユーザーを作ります。
パスワードはよしなに決めます。
useradd -m -s /bin/bash -G sudo user
passwd user
一旦 exit して user アカウントで入りなおします。
dockerをインストールします。
以下のコマンドを実行します。
sudo apt update -y
sudo apt install ca-certificates curl gnupg lsb-release -y
sudo mkdir -p /etc/apt/keyrings
curl -fsSL https://download.docker.com/linux/ubuntu/gpg | sudo gpg --dearmor -o /etc/apt/keyrings/docker.gpg
sudo chmod a+r /etc/apt/keyrings/docker.gpg
echo "deb [arch=$(dpkg --print-architecture) signed-by=/etc/apt/keyrings/docker.gpg] https://download.docker.com/linux/ubuntu $(lsb_release -cs) stable" | sudo tee /etc/apt/sources.list.d/docker.list > /dev/null
sudo apt update -y
sudo apt install docker-ce docker-ce-cli containerd.io -y
以下のコマンドを実行して docker グループに追加します。
sudo usermod -aG docker user一旦 exit して user でログインし直します。
❗
ログインし直さないとグループへの追加が反映されません。
GitHub上のリポジトリのページから [Settings] > [Actions] > [Runners]を開き、右上の [New self-hosted runner] をクリックします。
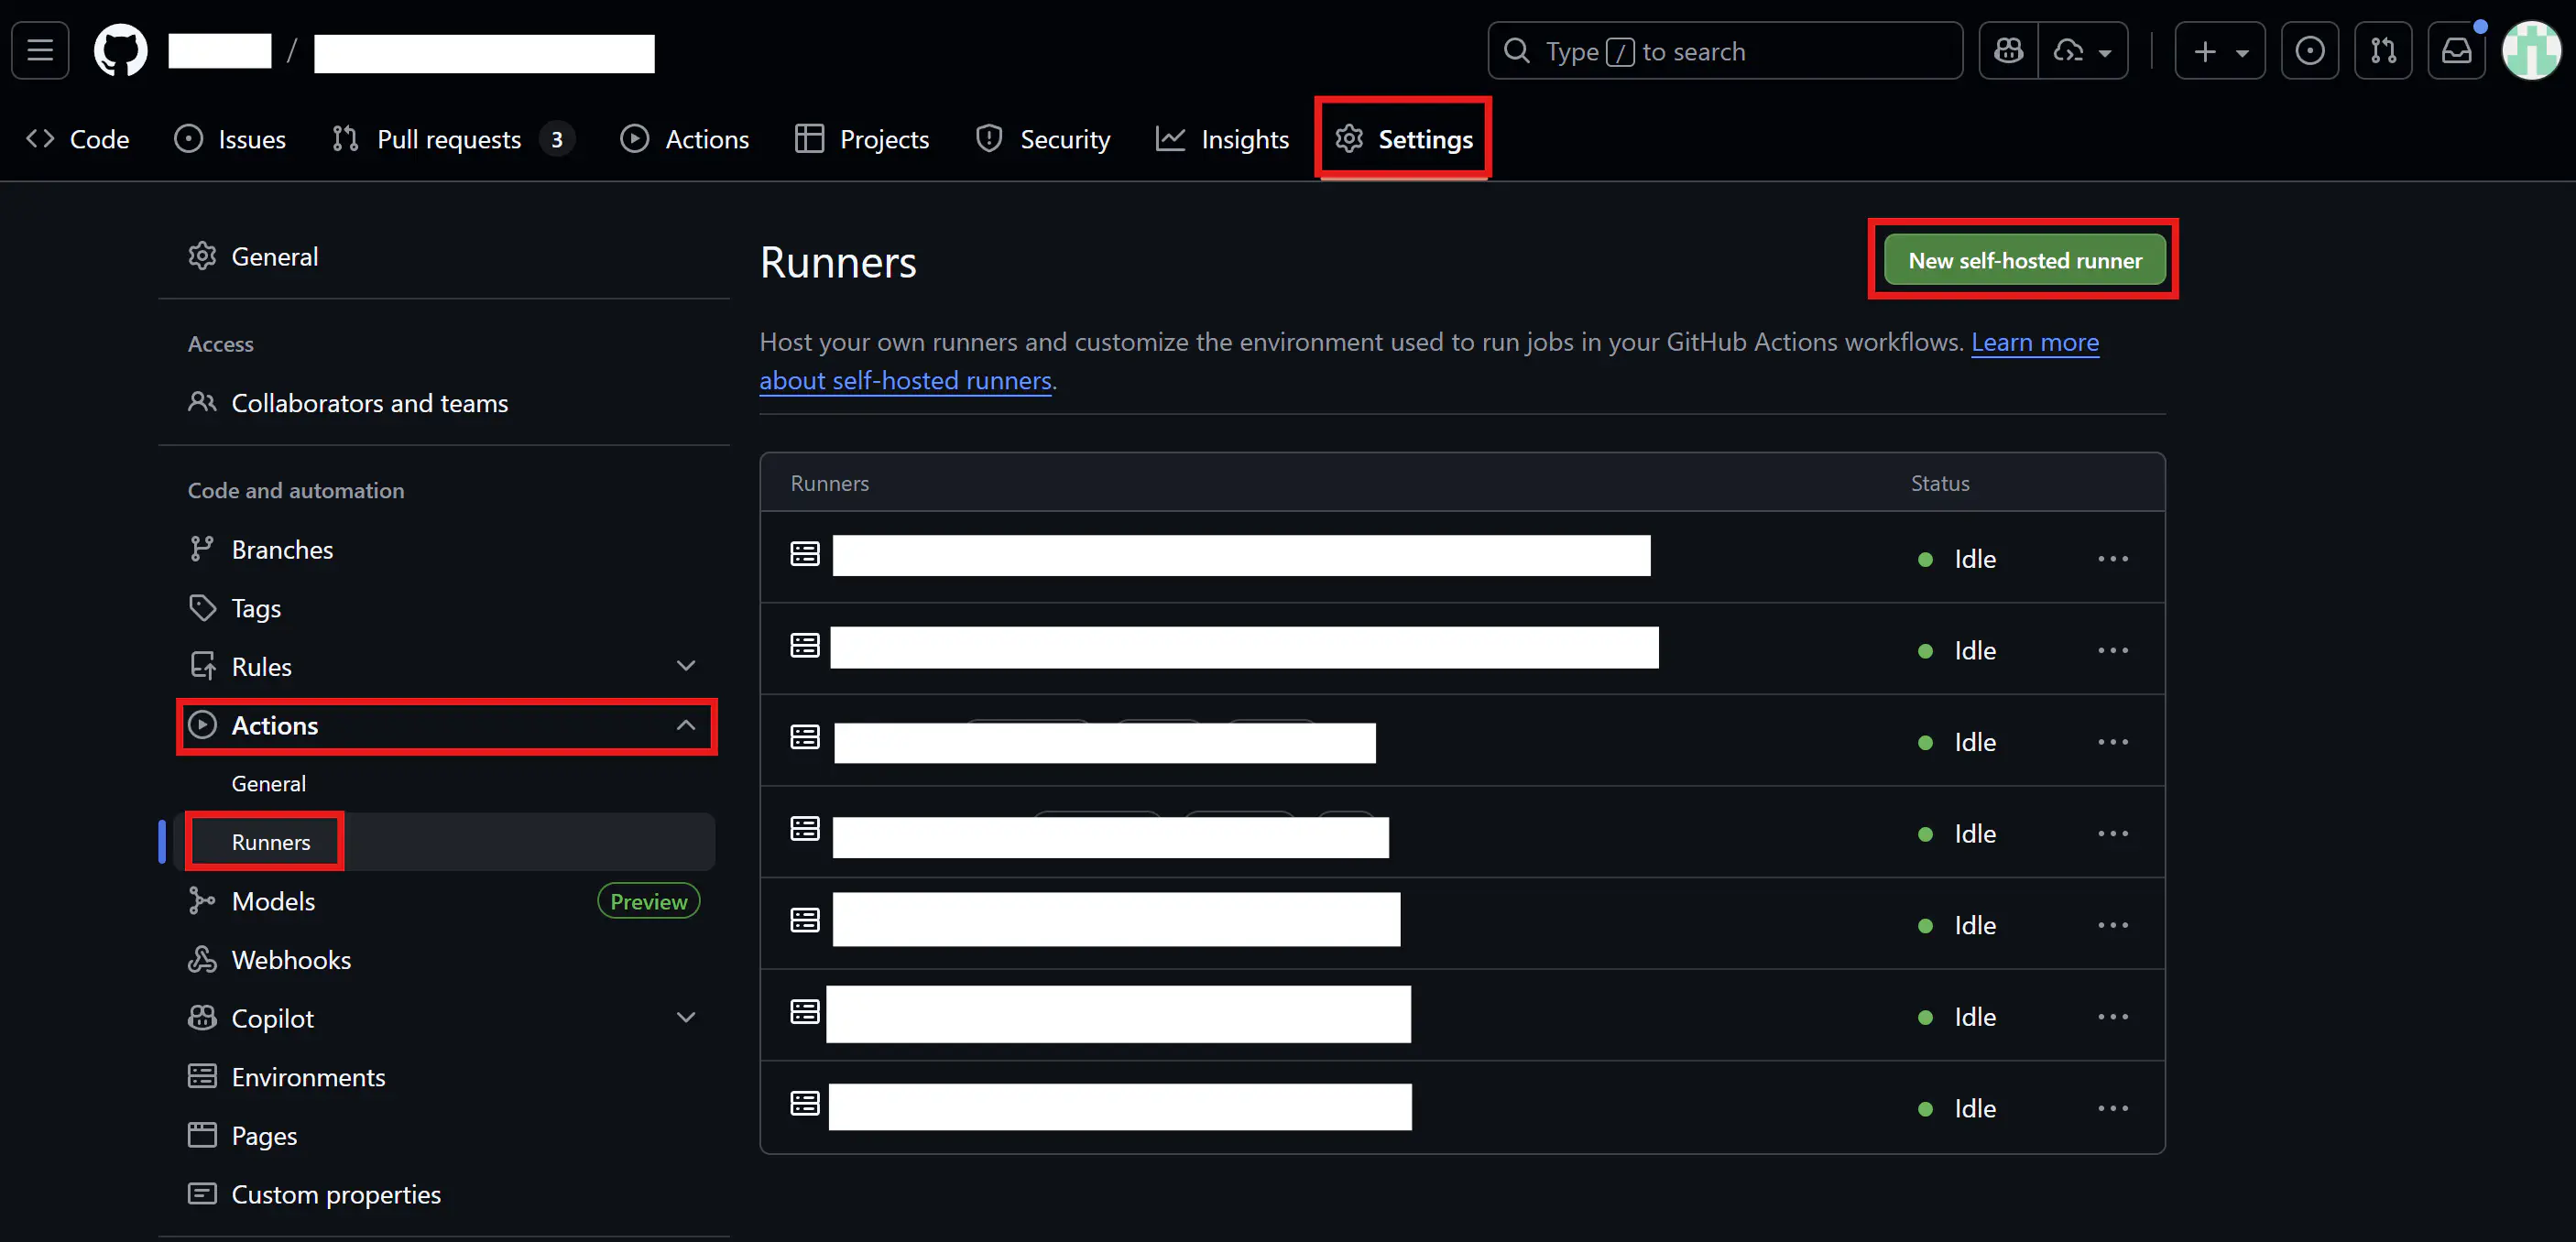
表示されるガイドに従って download 部分に表示される以下のようなコマンドを実行します。以下の通りではないのでガイドに従ってください。
mkdir actions-runner && cd actions-runner
curl -o actions-runner-linux-x64-2.328.0.tar.gz -L https://github.com/actions/runner/releases/download/v2.328.0/actions-runner-linux-x64-2.328.0.tar.gz
echo "01066fad3a2893e63e6ca880ae3a1fad5bf9329d60e77ee15f2b97c148c3cd4e  actions-runner-linux-x64-2.328.0.tar.gz" | shasum -a 256 -c
tar xzf ./actions-runner-linux-x64-2.328.0.tar.gz
次に、configure 部分 (1つ目のみ) を実行します。
./config.sh --url {リポジトリURL} --token {トークン}以下のように表示されるので、設定していきます。
入力すべき場所としては Enter the name of runner の部分と Enter any additional labels (ex. label-1,label-2) の部分です。runnerの動作をテストすることを考えると一意なタグをつけてあげるといいかもしれません。
--------------------------------------------------------------------------------
|        ____ _ _   _   _       _          _        _   _                      |
|       / ___(_) |_| | | |_   _| |__      / \   ___| |_(_) ___  _ __  ___      |
|      | |  _| | __| |_| | | | | '_ \    / _ \ / __| __| |/ _ \| '_ \/ __|     |
|      | |_| | | |_|  _  | |_| | |_) |  / ___ \ (__| |_| | (_) | | | \__ \     |
|       \____|_|\__|_| |_|\__,_|_.__/  /_/   \_\___|\__|_|\___/|_| |_|___/     |
|                                                                              |
|                       Self-hosted runner registration                        |
|                                                                              |
--------------------------------------------------------------------------------

# Authentication


√ Connected to GitHub

# Runner Registration

Enter the name of the runner group to add this runner to: [press Enter for Default]

Enter the name of runner: [press Enter for {ホスト名}] {runnerの名前}

This runner will have the following labels: 'self-hosted', 'Linux', 'X64'
Enter any additional labels (ex. label-1,label-2): [press Enter to skip] {一意なタグ}

√ Runner successfully added
√ Runner connection is good

# Runner settings

Enter name of work folder: [press Enter for _work]

√ Settings Saved.
最後に、以下のコマンドを実行してバックグラウンドで動かしたままにします。
sudo ./svc.sh install
sudo ./svc.sh start
以上でセットアップは完了です。お疲れ様でした。
Self-Hosted Runnerが不要になったとき、別のリポジトリのSelf-Hosted Runnerとして動かしたいとき、タグを変更したいときなどはSelf-Hosted Runnerを一度停止する必要がります。
Self-Hosted Runnerの一覧から削除したいRunnerの右側にある3点リーダーから [Remove runner] をクリックすると削除の方法が表示されます。
そこに表示されている、以下のようなコマンドを打つことで削除できます。
sudo ./svc.sh uninstall
./config.sh remove --token {トークン}
これで、「Self-Hosted Runnerを立てる」の configure 部分から実行しなおすことで、再び Self-Hosted Runner として動かすことができます。
サーバーを買ったおかげで Self-Hosted Runner を立て放題なのがうれしいです。